From Blurry Backgrounds to Sharp Landscapes
If you’ve ever admired a portrait with a beautifully blurred background or a sweeping landscape where every detail is sharp from front to back, then you’ve already experienced the impact of depth of field. It’s one of the most powerful creative tools in photography, yet it often feels confusing to beginners. The good news is that once you understand how it works, it becomes second nature—and it can dramatically improve the quality of your images.
Depth of field refers to the range of distance within a photograph that appears acceptably sharp. When only a small portion of the image is in focus and the rest fades into softness, that’s known as a shallow depth of field. On the other hand, when most or all of the scene appears sharp, from the foreground to the background, that’s considered a deep depth of field. This simple concept plays a major role in determining how your image feels and what your viewer notices first.
More than just a technical setting, depth of field is a storytelling tool. It allows you to guide the viewer’s attention and emphasize what matters most in your frame. In portrait photography, a shallow depth of field helps isolate your subject, removing distractions and creating a soft, professional look. In landscape photography, a deep depth of field ensures that every element, from nearby textures to distant mountains, is clearly visible. Understanding how to control this gives you the ability to shape your images with intention rather than relying on chance.
The most important factor influencing depth of field is aperture. Aperture refers to the opening in your lens that allows light to enter the camera, and it is measured in f-stops. A wide aperture, such as f/1.8 or f/2.8, creates a shallow depth of field, resulting in a blurred background and a sharp subject. A narrower aperture, such as f/8, f/11, or f/16, increases the depth of field, bringing more of the scene into focus. While the numbers might seem counterintuitive at first, the concept becomes clearer with practice—lower f-numbers create more blur, while higher f-numbers create more sharpness throughout the image.
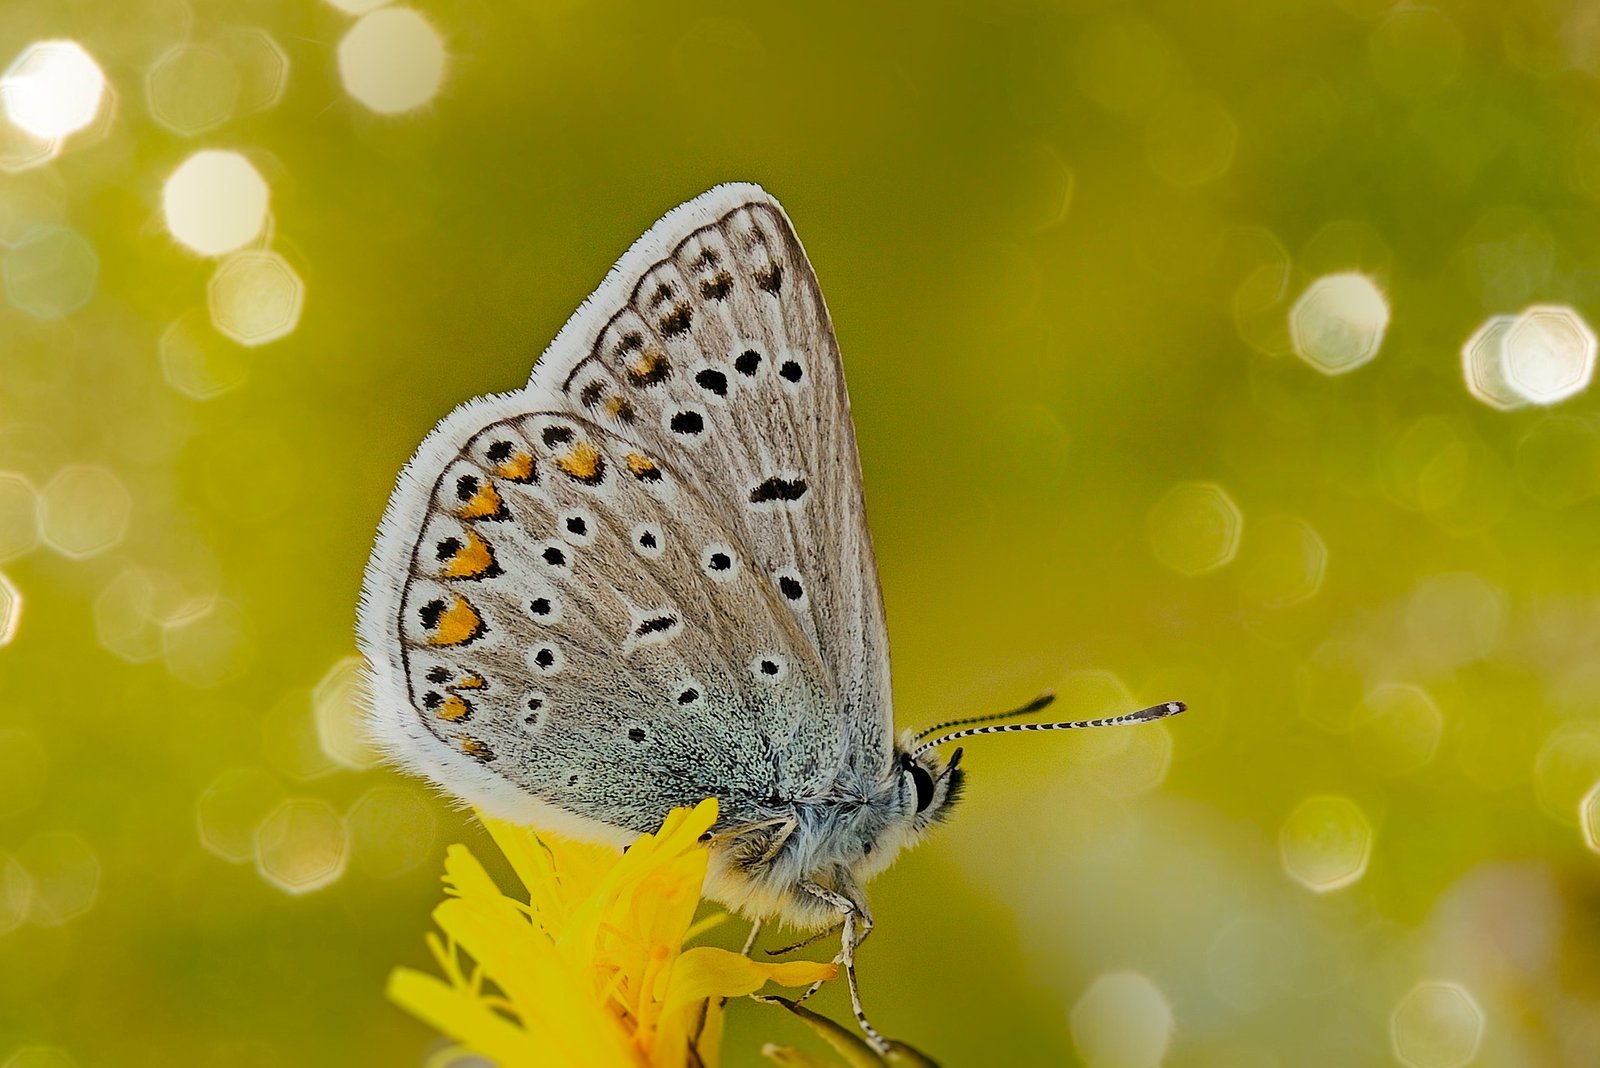
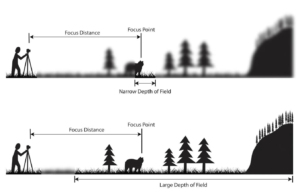 Distance to your subject also plays a significant role in depth of field. The closer you are to your subject, the shallower your depth of field becomes. This is why close-up and macro photography often produce images where only a tiny portion is in focus. As you move farther away, more of the scene falls within the focus range. This relationship is incredibly useful when trying to control background blur without changing your lens or settings.
Focal length is another important factor to consider. Longer lenses, such as 85mm or 200mm, tend to produce a more pronounced background blur, making them ideal for portraits and wildlife photography. Wider lenses, like 18mm or 24mm, naturally keep more of the scene in focus, which is why they are commonly used for landscapes and architectural photography. The lens you choose can significantly influence how the depth of field appears in your final image.
One of the most popular creative uses of depth of field is achieving that soft, blurred background often referred to as bokeh. This effect gives photos a professional and cinematic feel, drawing attention directly to the subject. To achieve this look, photographers typically use a wide aperture, position themselves closer to the subject, and ensure there is a good amount of distance between the subject and the background. When done correctly, the result is a smooth, creamy blur that enhances the overall composition.
On the opposite end of the spectrum, a deep depth of field is essential for capturing detailed landscapes and expansive scenes. In these situations, photographers use narrower apertures to keep everything in focus. It’s also common to focus slightly into the scene rather than directly on the closest object, which helps maximize sharpness throughout the image. Because narrower apertures reduce the amount of light entering the camera, using a tripod is often helpful to maintain sharpness while using slower shutter speeds.
There are also situations where a moderate depth of field works best. In cases like group portraits or environmental photography, you may want your subject to stand out while still keeping enough background detail to provide context. Using a mid-range aperture allows you to strike this balance, ensuring your subject remains clear without completely isolating them from their surroundings.
As you begin experimenting with depth of field, it’s common to run into a few challenges. Sometimes images come out softer than expected, or backgrounds don’t blur as much as you’d hoped. These issues are usually easy to correct by adjusting your aperture, changing your distance from the subject, or reconsidering your focal length. With practice, these adjustments become instinctive, allowing you to make quick decisions in the moment.
It’s also worth noting that depth of field and background blur, while related, are not the same thing. Depth of field refers to how much of the image is in focus, while background blur describes the quality and appearance of the out-of-focus areas. You can have a shallow depth of field without dramatic blur if the background is too close to your subject. Understanding this distinction helps you better control the visual outcome of your photos.
Creatively, depth of field opens up endless possibilities. You can use it to isolate a subject, create a sense of depth, or even introduce an element of mystery by allowing parts of your image to fall out of focus. It becomes a way to shape how a viewer experiences your photograph, guiding their attention and enhancing the story you’re trying to tell.
Mastering depth of field is one of the fastest ways to elevate your photography. It transforms the way you approach composition and gives you greater control over your results. By experimenting with different apertures, distances, and lenses, you’ll quickly develop an intuitive understanding of how it works. Over time, these decisions will feel natural, allowing you to focus less on the technical side and more on your creative vision.
